Small-batch assembly jigs for Toronto workshops
Updated · 9 min read
A component nest is useful only if it seats the part, leaves the work accessible and repeats the right position. Plan one low-load bench aid and a practical fit check.
Research verified: 2026-10-05.
A 3D printed assembly jig can make sense when a lightweight component repeatedly needs the same orientation, spacing or visible alignment on a workbench. The useful first order is one fit sample with a clear purpose: seat the part, complete the hand operation, remove it and check the result. A shape that holds a component once still needs a reload check.
For a Toronto workshop, that could mean a nest for a decorative part, a stop for positioning a paper label or a tray that presents a small kit in assembly order. We would start with the awkward step and work towards the simplest aid that resolves it.
Find the step that keeps interrupting the work
Watch one complete assembly cycle. Where does the operator stop to find an edge, turn a piece around, hold two things at once or check the same spacing again? Write down that interruption before choosing a shape.
UltiMaker's ERIKS case study describes engineers listening to operators and replacing an improvised support made from a roll of tape with a purpose-shaped aid. It also describes an initial loose fit in a different jig and a subsequent revision.1 The useful lesson for a small bench task is to observe the operation and leave room for a fit iteration. The industrial applications and their reported results do not establish what a desktop print will achieve in your workshop.
Try a sentence like: “Keep this lightweight base facing the same way while we place the trim.” That gives the person preparing the model something concrete to solve. “Make assembly faster” leaves the difficult choices unanswered.
Jig, fixture or nest?
Carr Lane distinguishes a jig that guides a cutting tool from a fixture that supports and locates the workpiece during machining or assembly.2 Many workshop “assembly jigs” are closer to fixtures. For the modest aids here, component nest, positioning stop and layout guide are usually clearer names.
Our scope is low-load hand positioning and visual layout. Machine workholding, powered cutting, press tooling, structural fixtures and safety inspection gauges need specialist tooling and an appropriate qualification process. See our terms of service for the service boundaries.
Choose the simplest route that solves the position
Before commissioning a custom model, check for an original manufacturer assembly aid or an existing workshop solution. A print is worth exploring when a particular component shape is the main difficulty.
Use this comparison to choose a first step.
| Route | When to consider it | What to check first |
|---|---|---|
| Original or existing purpose-built aid | A suitable aid is available for the exact component | Correct revision, access and intended use |
| Paper template, square or workshop-made stops | The task is visual layout or references ordinary straight edges | Whether the operator can load, inspect and remove the pieces conveniently |
| Printed component nest or positioning guide | A custom shape could locate a lightweight part during a benign hand operation | Authorized model, intentional contact surfaces and one fit sample |
| Specialist tooling | Force, heat, wear, demanding accuracy or serious failure consequences govern the operation | Application requirements and qualified design before ordering |
Include model preparation and possible revisions when comparing the effort. A supplier's factory case study cannot supply your shop's expected saving.
Decide what touches the part
Carr Lane's locating guidance stresses reference features and warns against redundant contacts that compete to locate the same movement.3 It is written for industrial workholding. Our modest translation is to identify the surfaces that set the useful position and leave deliberate clearance elsewhere.
Give the model preparer three things: the component revision, the reference surface or edge and the full loading sequence. Ask them to distinguish a seating surface from a surface that merely happens to be nearby.
For each proposed contact, ask:
- What position does this contact establish?
- Can we see that the part has reached it?
- Can a projecting detail or residue keep the part from seating?
- Can fingers reach the work area and lift out the completed arrangement?
Formlabs also recommends inspection-friendly geometry, visual alignment features and checking how a part seats against locating surfaces and supports.4 Its guidance covers SLA and SLS processes. These are useful functional questions for our sample, without transferring its material recommendations to a filament print.
Hypothetical example: laying out a tabletop ornament
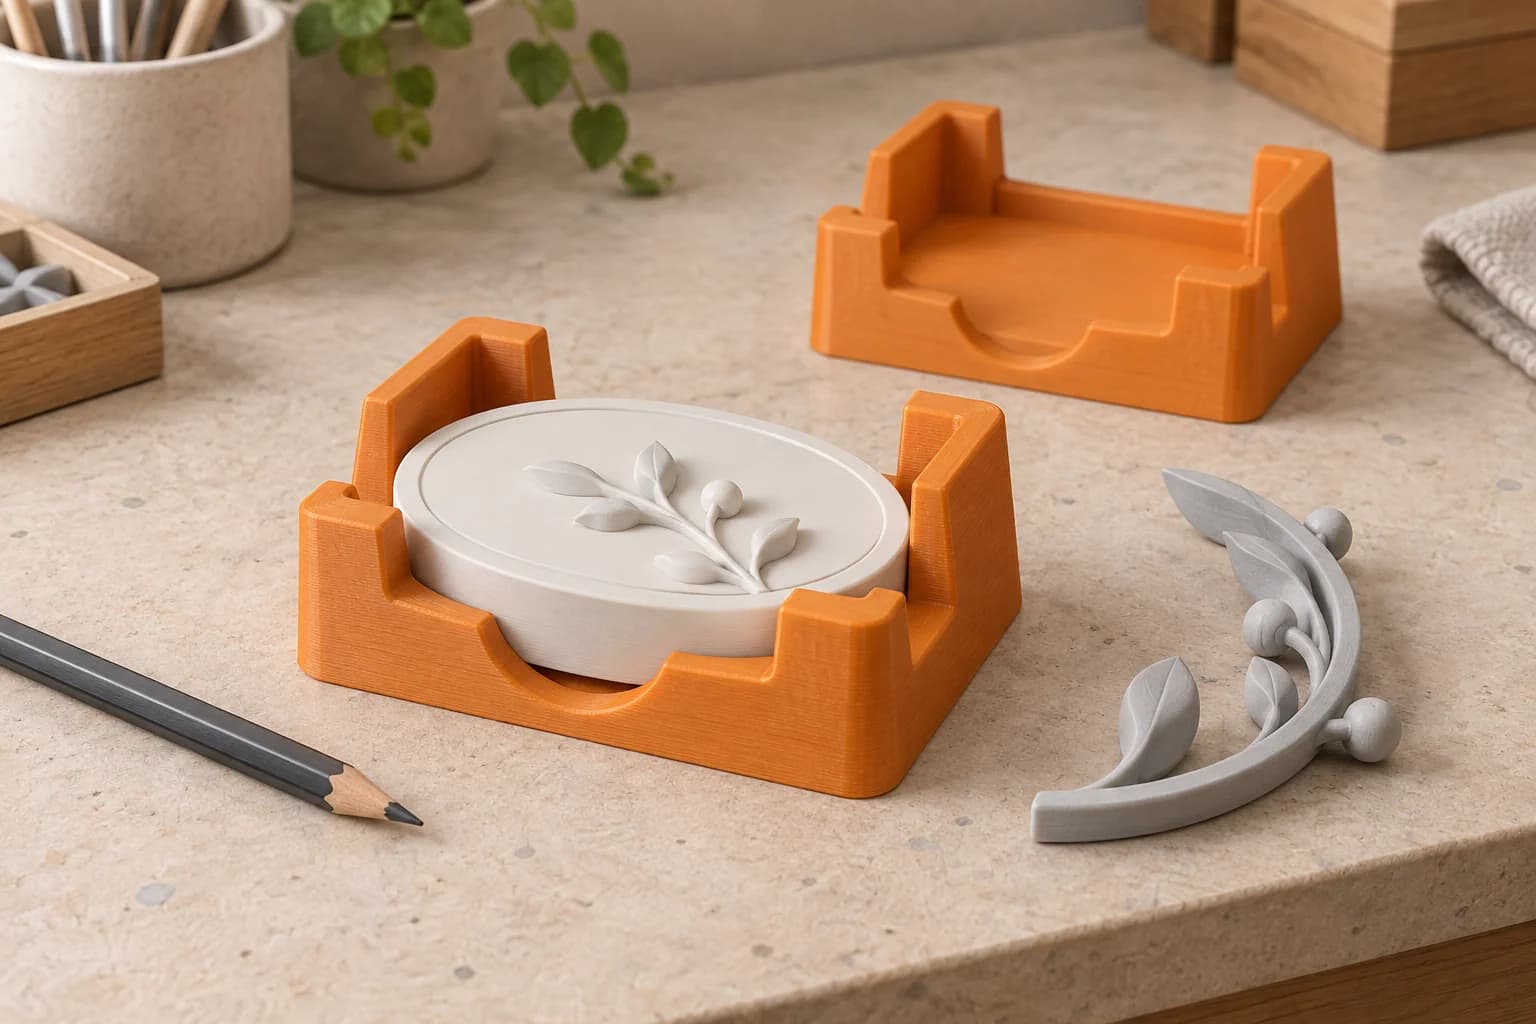
Imagine a workshop assembling a short run of nonpowered desk ornaments. Each has a lightweight oval base and a decorative curved insert. The operator keeps turning the base and judging the insert's offset by eye. This is a proposed example, not a customer job.
The shop's designer could prepare an open nest that supports the base underneath and references a chosen edge. A separate stop indicates the insert's intended position. A front notch leaves finger access; an open area lets the operator inspect the alignment. The nest only assists layout. It applies no clamping or pressing force.
Before printing, the shop chooses a separate check for the arrangement, such as its approved layout drawing or master outline. Checking only that the pieces sit inside the nest would tell us little about whether their relative position is correct.
Suppose the first sample rocks because a raised detail underneath the base meets the seating surface. Record exactly where that happens. The next model revision could change the support region to clear that detail while preserving the chosen reference. Reslice that revision and repeat the loading and layout checks. Tightening the whole pocket would address a different problem.
That is a useful fit iteration: identify one failed contact, change the relevant feature and check the result again. It is not a promise that every aid will be resolved in two prints.
Check the first sample through a complete cycle
Use this sample checklist with the acceptance checks your shop has defined for the task.
- Check the sample against the intended model. Confirm the revision and identify the seating region, stop and clearance areas.
- Load the component without forcing it. Look for rocking, a false seated position or a feature touching somewhere unexpected.
- Perform the whole hand operation. Reach the placement area, inspect the result and remove the arrangement. Include the operator's normal sequence.
- Remove and reload independently. Start again several times. If available, use several representative components from the intended batch, rather than repeatedly checking only one.
- Inspect the result outside the nest. Compare it with the shop's chosen reference. A repeatable position can still be the wrong position.
- Look at the contact surfaces. Note rub marks, damaged finishes, trapped residue and any change in seating during the trials.
- Record the specific change needed. Keep the model revision identifiable, revise the source feature and reslice before ordering another sample.
Order further aids only after deciding whether the sample serves the actual operation. If the check reveals a need for force, heat or accuracy beyond a simple positioning aid, change the tooling route.
Give the material a realistic workbench brief
Choose from the materials currently shown in the quote flow. Colour is a separate choice from suitability.
Write down whether the aid will sit near a warm process, touch adhesive residue or cleaners, rub against a finished surface or remain under pressure. Prusament describes PLA as hard and brittle, with limited heat resistance.5 That is screening information, not proof that a particular submitted model suits the bench.
Be specific about cleaning: product name, concentration, contact time and temperature. Prusament's chemical-resistance study identifies those conditions, along with mechanical stress, as relevant variables and states that its results need further testing for more accurate analysis.6 A generic “cleaner resistant” label is insufficient for choosing this aid.
For a cosmetic component, check contact marks on representative low-value pieces. We do not promise scratch-free contact. Remove an aid from use if a contact cracks, distorts or develops wear that changes the seating; reassess the design and conditions before replacing it.
Prepare the model before ordering
We print authorized customer models. CAD creation, reverse engineering, model repair, metal inserts, fixture installation and engineering qualification are separate work.
For a downloaded model, record the creator, exact licence and version, permission to modify and any conditions on the intended use. Creative Commons explains that a NonCommercial licence depends on the intended use and circumstances, and recommends seeking clarification when uncertain.7 Our downloaded-model guide helps organise that check.
Supply a compatible pre-sliced .3mf or .gcode. If your designer provides an STL, follow our model-to-print-ready guide, then the plate slicing and export steps. Opt-in auto-slicing of an unsliced .3mf is subject to availability.
Once the model and sample plan are ready, upload the file, select a compatible stocked material and review the quote in CAD. Samples are normal print orders. Plan around the ordering options shown: free scheduled Toronto pickup or Canada Post shipping. Leave time for the shop's fit check and any model revision before committing to more aids.
If the task is marking an offset or holding a light finish sample, compare the simpler millwork guides and painting stands before designing an assembly nest.
Once one nest performs the whole bench cycle, use the fixture sample-to-batch workflow to freeze the accepted geometry and preparation before ordering copies.
For a tray that sorts disassembled hardware, the numbered repair-bench organizer guide keeps removal steps and original fastener locations attached to each pocket.
Workshop questions
Does a nest need to wrap around the whole component?
Start by asking which contacts establish the required position. An open arrangement may give better access to those regions. Have the model preparer choose the contacts deliberately, then verify them on the sample; there is no universal pocket clearance.
What if the sample fits but the assemblies still vary?
Separate seating from the assembled result. Check whether different components reach the same stops, whether loading changes the orientation and whether the chosen stop references the correct feature. Compare the result independently of the nest.
Can you design the aid from a photo or add drill-guide inserts?
Those services are not included. A designer or tooling specialist needs to prepare the appropriate model and any additional hardware requirements. This article's printed aids are for low-load layout and positioning.
Can we order a batch immediately?
Begin with a sample where contact fit is uncertain. Use the full operation to decide whether it is useful before ordering more. A successful fit check supports that particular task; it does not establish a general fixture life or production qualification.
Sources checked
UltiMaker: custom jigs at ERIKS, supplier-published case study with named engineer Jesse Ippel; verified: 2026-10-05.
Return to text: 1
Carr Lane: differences between jigs and fixtures; verified: 2026-10-05.
Return to text: 1
Carr Lane: locating and clamping principles, industrial design guidance; verified: 2026-10-05.
Return to text: 1
Formlabs: jigs, fixtures and manufacturing aids, SLA/SLS design guidance; verified: 2026-10-05.
Return to text: 1
Prusament PLA material information; verified: 2026-10-05.
Return to text: 1
Prusament: chemical resistance of 3D printing materials, manufacturer experimental report; verified: 2026-10-05.
Return to text: 1
Creative Commons: NonCommercial licence FAQ; verified: 2026-10-05.
Return to text: 1
Have a sliced file ready?
Upload it for an instant quote in CAD.