Interior-design mockups: checking proportions before fabrication
Updated · 8 min read
A practical review method for interior designers: choose the right sample scale, compare custom forms consistently, and give the fabricator a precise client decision.
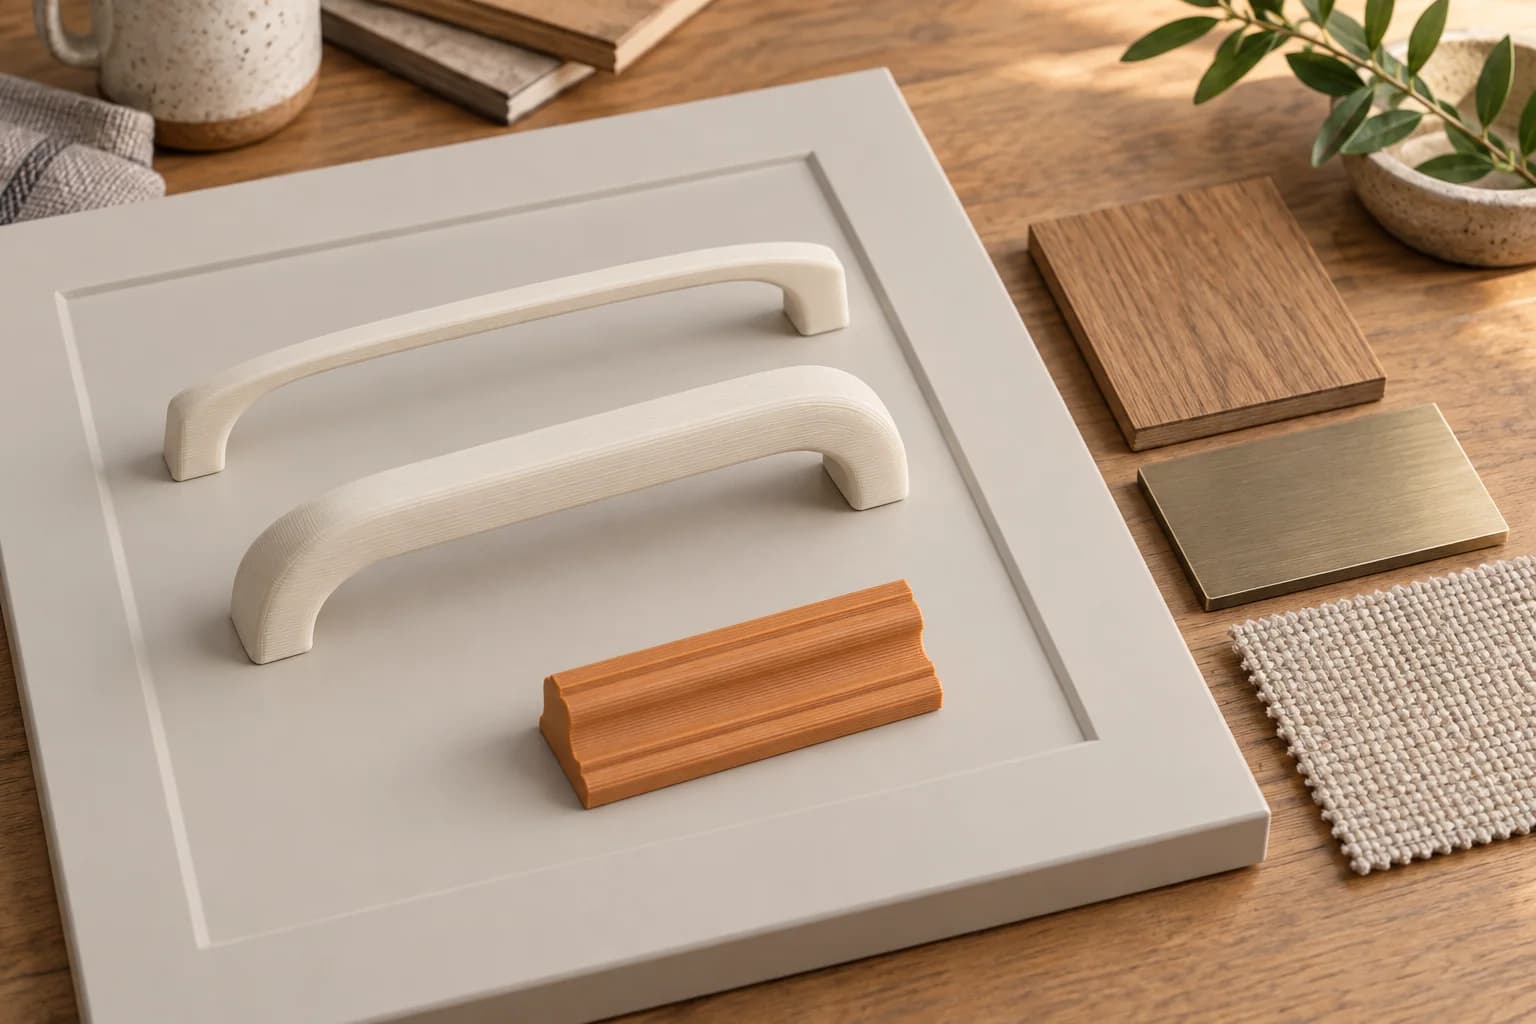
A 3D printed interior-design mockup is useful when you have a specific question about a custom shape: is this pull too bulky, does this trim project too far, or is the relief clear enough? Print at the scale that answers that question. A miniature can show relationships within a room; a loose actual-size sample lets you examine a detail in hand. Use the original material and finish samples for the finish decision.
The aim is to leave a client meeting with a precise instruction for the fabricator. “Choose the slimmer profile, keep this edge, review the finish separately” is more useful than “we liked the mockup.”
Start with the question the render leaves open
Imagine a hypothetical Toronto kitchen project with a custom cabinet pull. The render communicates the overall palette, but the client is undecided between a slender curve and a fuller one. The unresolved question is the pull's visual bulk and feel. Printing an entire kitchen would add little to that decision. Two loose actual-size variants, held against the same cabinet-front sample board, give the discussion a useful focus.
There is documented precedent for physical hardware review. Emtek describes using successive 3D printed prototypes to refine how its hardware feels. Designer Doorware describes prototypes that clients can hold, assess and refine before production.1 These are manufacturers' accounts of their own development processes; their final products and engineering services are separate from our plastic review samples.
For a flat outline, start with a drawing, card cutout or foam-board study. For a catalogue handle or moulding, ask the supplier for the actual sample. A print earns its place when you need to examine custom curves, projection or relief that those simpler methods do not explain clearly.
Choose between a miniature and an actual-size sample
The right scale follows the decision. UltiMaker's account of MATT Architecture describes both iterative architectural models and a decorative façade pattern printed at full size before a mould and tile were made.2 That is adjacent architectural evidence. The interior examples below are our proposed applications, rather than documented projects from that practice or our workshop.
| Question for the meeting | Useful review sample | What still needs another check |
|---|---|---|
| Does the cabinet bank dominate the room? | Simplified room cutaway with cabinets and nearby furniture at one stated scale | Site dimensions, full-size access and construction details |
| Is the pull visually too heavy? | Loose actual-size variants against the same review board | Final attachment and performance in use |
| Is the trim profile too deep or busy? | Short actual-size section retaining the complete profile | Long runs, junctions and actual production material |
| Does an ornament's relief read clearly? | Actual-size crop retaining the motif and edge transition | Final material, finish and fabrication process |
| Which commercial finish should we specify? | Original supplier finish or material samples | Any properties the supplier's sample does not represent |
For example, a 3,000 mm room dimension becomes 150 mm at 1:20. That arithmetic helps you work out a model footprint; it does not make 1:20 the right scale for every interior. Check the overall footprint before preparing the whole room.
Keep miniature furniture and room components at the same stated scale. Record any detail enlarged for visibility. A deliberately thickened miniature handle can indicate its location, but it should not become evidence that the actual-size handle has the right proportions.
For touch, edges and local projection, use actual size. A reduced pull may look elegant on a miniature cabinet yet tell the client very little about the form they would hold.
Make the comparison fair
Choose one change to compare first. In the hypothetical kitchen example, keep length, colour and context the same while comparing the two cross-sections. If the fuller version is also longer and printed in a darker colour, the client has several differences to react to and the selection becomes harder to interpret.
For the meeting, we suggest this short brief:
| Brief field | Example for a loose pull study |
|---|---|
| Decision | Choose slender or fuller cross-section |
| Variants | A, revision 03; B, revision 03 |
| Scale and context | Actual size; same cabinet-front review board |
| Keep consistent | Overall length, filament, print orientation and surface treatment |
| Examine | Front silhouette, side projection, edge shape and room for fingers |
| Outside this review | Finish, fasteners, installed strength and long-term use |
Use removable labels or a separate sheet to identify the prints. Keep old revisions out of the active comparison, but retain them with their notes if they explain why the design changed.
Inspect the printed review face before the meeting. Prusa's FFF guidance explains that orientation and support contact affect surfaces, that apparently smooth curves can contain visible facets, and that thin features need attention.3 A support mark or missing groove may distract from the shape you meant to compare. Look at the sliced preview first, then check the received sample against it.
Ask the client specific questions: “Which projects too far from the board?” “Which edge feels too prominent?” “What would you change?” Record their answer in their own words. A preference becomes actionable when you know what prompted it.
Keep finish approval beside the form study
Bring original timber, metal, textile or coating samples relevant to the proposed work. Keep the printed form neutral enough that its colour does not become an accidental finish selection. Show the actual finish sample beside it, and make clear which item answers which question.
For existing decorative profiles, a supplier sample may settle the issue without printing anything. Orac's regional sample page describes short profile sections for assessing proportions and presenting options.4 Confirm sample access with your local supplier; that page does not establish Canadian availability or a local sample policy.
Paint samples also have a defined purpose. Benjamin Moore's Canadian colour-sample page recommends evaluating colour on a wall or foam board under changing light, and states that its sample formula represents colour rather than the performance of its regular paints.5 Follow the relevant supplier's sampling method for your selected finish.
A printed sample's surface, weight and feel belong to that sample. Use it to discuss geometry. Ask the fabricator for the appropriate actual-material mockup when the remaining decision involves grain, sheen, edge finishing or an assembled junction. We do not provide sanding, painting or finishing with a print order.
Write down what the client actually accepted
Avoid an unqualified “approved” note on the print. Write the decision in three parts:
- Form accepted: the selected silhouette, profile or relief, identified by revision and scale.
- Fit still to check: dimensions or interfaces requiring further measurement or a separate sample.
- Finish not represented: the production material and finish to be selected or confirmed using their own samples.
For the hypothetical pull, a useful note could read: “Select A, revision 03, actual size. Client prefers its slimmer side view against the cabinet-front board. Verify final projection and fixing details with the fabricator. Metal and finish remain undecided.”
Photograph the selected sample from the front and side with its reference board. Retain the file revision, review date, client questions and selection reason. If a dimension needs changing, identify it explicitly before revising and slicing the next sample.
Keep these as loose tabletop visual and fit studies. Form acceptance does not qualify a print as installed hardware, an electrical component, a structural part or an overhead attachment. The fabricator's final material, assembly and installation review remains a separate step.
Prepare the file for a Toronto print order
Confirm that you own the design or have permission to reproduce it, including any manufacturer or downloaded geometry. A drawing or photograph can support your brief, but it is not a print-ready file. We print authorized customer models; CAD conversion, reverse engineering and model repair are outside the order.
Check units and the intended sample dimensions before slicing. SketchUp's export documentation includes unit choices and an option to export only selected geometry, useful when isolating a detail from a larger model.6 If you have an STL, our STL-to-print-ready guide explains the next preparation step.
For ordering, use the plate slicing and export guide to prepare a compatible pre-sliced .3mf or .gcode. An unsliced .3mf can use opt-in auto-slicing where available. If the comparison spans several plates, check the multi-plate order guide.
Then upload the prepared file, review the parsed print information, choose compatible stocked filament and approve the quote in CAD. The Toronto print-cost guide explains the quote factors. Free scheduled Toronto pickup and Canada Post shipping are available subject to the ordering options; plan the client meeting around the order's current status.
If the client needs to discuss a whole site or building arrangement, use the architectural model scale and component plan rather than multiplying full-size detail samples.
Once a pull design and fixing layout are settled, the cabinet-handle template guide addresses the separate task of transferring its centres onto fronts.
If the next step is a product-development review, the form-and-fit prototype guide separates shape learning from assembly checks and questions to carry into tooling.
Questions before ordering a mockup
Should we print the whole room or one detail?
Print the smallest useful context for the unresolved decision. A room cutaway can help compare overall relationships. A loose actual-size pull or short profile is more useful for local bulk, touch and projection. Start with your meeting question and choose the sample from there.
Can the print match the final finish?
Use original finish and material samples for that selection. The print can communicate the form while the swatches communicate the specified finish. Do not treat a filament colour or layer texture as an approved production finish.
Can we send a SketchUp model or a drawing?
Prepare printable geometry and a compatible sliced file first. A drawing alone is insufficient, and a saved modelling project is not necessarily sliced. Use the linked preparation guides; opt-in auto-slicing applies to an unsliced .3mf where available.
Can we install the sample after the client chooses it?
This workflow is for review samples. A visual or in-hand choice does not establish the attachment, durability or suitability of an installed part. Keep the chosen sample as a reference for the fabricator and check our terms for allowed uses.
Sources checked
Emtek: The Galapagos Project — iterative printed prototypes to refine touch; Designer Doorware: Bespoke design — in-hand prototype review before production. Both are firsthand manufacturer descriptions. verified: 2026-10-05.
Return to text: 1
UltiMaker: MATT Architecture case study — iterative models and a full-size decorative façade pattern preceding a mould and tile. verified: 2026-10-05.
Return to text: 1
Prusa: Modeling with 3D printing in mind — orientation, support-contact surfaces, faceted curves and thin features. Process guidance, not a specification for our finished samples. verified: 2026-10-05.
Return to text: 1
Orac: Samples — regional manufacturer guidance on profile samples and presentation. Canadian sample availability unverified. verified: 2026-10-05.
Return to text: 1
Benjamin Moore Canada: Colour sample product details — colour assessment under changing light and the limits of the sample formula. verified: 2026-10-05.
Return to text: 1
SketchUp Help: Importing and exporting STL files — export units and selected-geometry options. verified: 2026-10-05.
Return to text: 1
Have a sliced file ready?
Upload it for an instant quote in CAD.