Test one countertop display before ordering the set
Updated · 9 min read
Use one light-product display sample to review the actual package, counter, customer-applied finish and cleaning method. Record what passed before repeating the approved file.
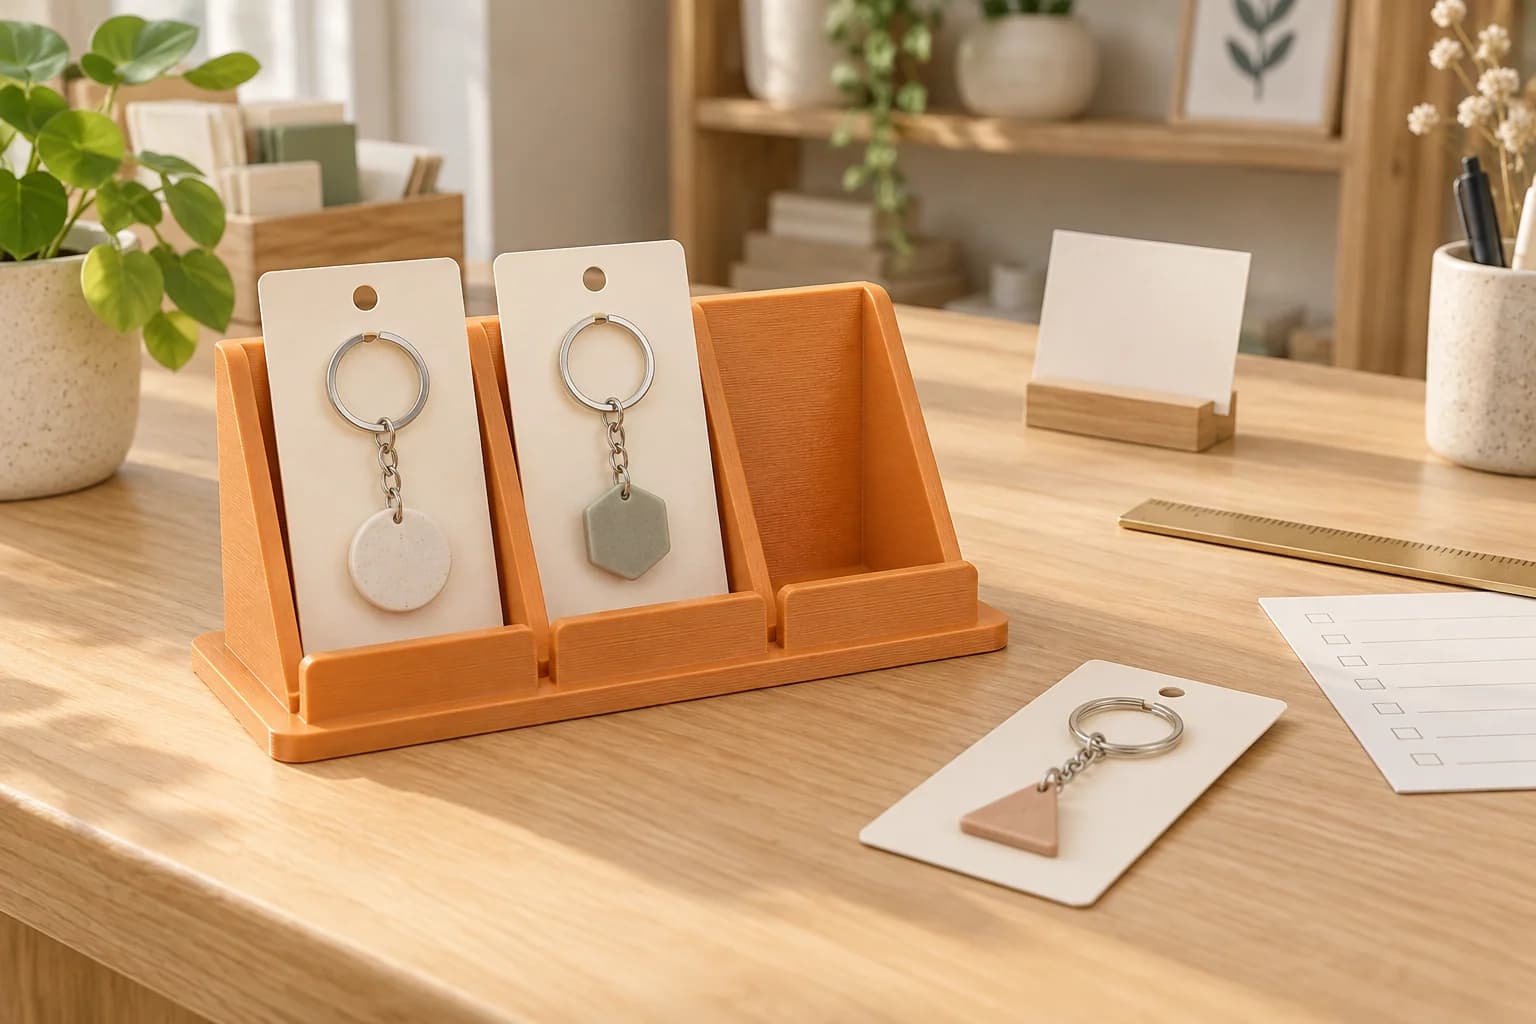
Before ordering copies of a small countertop display, put one full-size sample on the intended counter with the intended product. Check what fits, what people can see and what happens when an item is removed. Then approve a specific version of the design and its print file.
A rendering is useful for choosing a direction. The physical sample answers different questions. Display manufacturer Frank Mayer describes full-scale prototypes as a way to review footprint, materials, graphics and access to products before repeat production.1 For a small printed stand, we can turn those questions into a manageable counter review.
Give the sample a short job description
Suppose you have designed a three-pocket stand for lightweight carded keyrings. The unanswered questions might be whether the cards sit neatly, whether the front lip hides the product name and whether staff can refill it without moving the price sign. This is a hypothetical example, not a report of our own testing.
Write those questions down before printing. If you only need to decide how much counter space to reserve, try a paper footprint or foam-core mockup first. Frank Mayer's model-shop process includes foam-core models for visualizing dimensions.2 An existing stock stand is also worth trying before developing a product-specific shape.
A printed sample becomes more useful when the question involves the pocket, the printed surface or handling the real package. Keep this exercise to a small, indoor stand for light merchandise, with its entire base supported. Larger fixtures, heavy products, suspended displays, powered demonstrations and food-contact uses need a different brief.
The package belongs in the test
Use the exact product and packaging revision you intend to display. Note the SKU, card dimensions, packaged weight and which face must remain visible. Keep a reference item with the sample. A thicker card, different folded edge or new package shape should be easy to spot later.
Samtop's sampling guidance identifies actual products, dummy products or confirmed dimensions as useful inputs when product fit and spacing matter.3 A dummy can help, provided you are clear about what it represents. A blank card with the right outline may show whether three facings fit. It does not reproduce the weight of the keyring, the package's flexibility or how its surface rubs against the pocket.
For the fit review, insert, remove and replace an inexpensive representative item in each pocket. Try the movement a customer would make, then the movement staff would use to refill it. Look for snagged edges, binding, scuffing, awkward finger access and an item that sits at an unintended angle. Inspect the package afterwards as well as the stand.
Include the price or information card. Product fit and sign fit are separate interfaces: Displays2Go, for example, specifies its countertop sign holder's graphic channel and supported media separately from the holder's overall size.4 Its acrylic product dimensions are not clearance rules for your printed design.
Give it its real patch of counter
Clear an area on a level, fully supporting surface, well away from an edge. Start with the footprint the retailer has actually allowed, including the sign and the space needed to reach the merchandise. Ontario display practitioner Scott Buchanan's planning guide asks about permitted footprint, overall height, placement, approach direction and pricing information.5
For our hypothetical stand, check it full, with one pocket occupied, and empty. Remove a card gently using ordinary intended handling. If the base rocks, slides or tips, pause the approval and revise the design or choose an appropriate manufactured stand. Increasing the height to reveal a label is a change to test, not an automatic solution.
Now step back to the normal approach. Check from the front and from the side customers actually pass. Include a lower seated view where relevant. Use the counter's lighting, neighbouring merchandise and intended sign. Can you identify the product? Does the lip obscure its name? Does the stand block something staff need behind it?
Take photos from positions you can repeat. A close-up looking down into the pocket can document fit, but it is not a substitute for the customer's view across the counter.
Keep a review sheet beside the sample
The following is our proposed practical record, not a published test standard. Leave a question open when you have only checked it with a dummy or on a substitute surface. Do not turn an untested assumption into a tick.
| Check | Keep these conditions identifiable | Record before deciding |
|---|---|---|
| Product fit | Product SKU, packaging revision, pocket and real item or dummy | Binding, rubbing, loose positioning and any untested package differences |
| Removal and refill | Intended movement, full and partly filled arrangements | Snags, finger access and whether staff must shift another object |
| Counter behaviour | Counter surface, full/partial/empty arrangement, whole base supported | Any rocking, sliding or tipping during gentle intended handling |
| Presentation | Approach/front/side viewing positions, lighting, neighbours and sign | Obscured names, blocked price information and repeatable photos |
| Appearance | Selected filament and any customer-applied finish | Texture and colour acceptance under the relevant lighting; fit after finishing |
| Cleaning | Cleaner identity, dilution if applicable, method and drying period | Visible or tactile changes after drying and remaining uncertainty |
Give the sheet a sample ID and a date. End each row with a decision: accept the observed feature, revise it, or check again under the missing condition. For several counters, add location IDs; the smallest available space or a different surface may deserve its own review.
Approve the finished surface you intend to use
A rough fit sample can settle geometry while leaving appearance open. If your team will sand, fill or paint the set, finish one representative sample before approving its appearance. Prusa's postprocessing overview distinguishes those operations from the freshly printed part.6 Recheck the product pockets and sign interface after your chosen process.
Choose among materials and colours currently available in our ordering flow, taking the location into account. Prusa describes PLA as useful for quick prototypes while noting limits under heat, UV exposure and impact.7 That is material-screening information, not a rating for your finished stand. Record a sunny placement or heated storage condition rather than assuming that “indoors” resolves the environment.
For cleaning, first check the cleaner and coating makers' instructions. If the proposed method is suitable to try, use a spare piece or discreet sample area with the selected material and any intended finish. Record the method and inspect after drying. Prusament's chemical-resistance work treats the substance, concentration, exposure time, temperature and stress as relevant variables.8 Its specimen tests do not establish how your finished display will respond to wiping. One short sample check cannot establish long-term cleaner compatibility.
Make each revision answer one question
Label variants clearly and change one feature at a time where practical. Keep the product reference, placement and review method consistent.
For example, suppose variant A's front lip hides the keyring's name. Variant B lowers only that lip. The next review can ask whether the name is visible and whether the card still stays positioned during removal. If B introduces a new problem, it has not earned approval just because the label looks better. Record the problem and make another deliberate revision.
Keep rejected files away from the final order folder. “Latest” is a weak description when several people have exported copies. Use a revision identifier that appears in the source filename, sliced filename and review sheet.
Carry the accepted sample into the repeat order
Samtop describes the approved sample, drawings, finish references and confirmed specifications as references for repeat production.3 For your small print order, keep a compact approval package:
- The accepted sample ID and design revision.
- The exact compatible sliced file, with material choice and print orientation recorded.
- The reference product and packaging revision.
- Photos of the accepted arrangement and the review sheet.
- Any customer-applied finish reference and the intended counter locations.
Changing the package, material, orientation, finish or counter conditions can reopen the relevant checks. When the set arrives, compare the observable features you recorded rather than relying on memory of the first sample.
We print authorized customer models supplied as compatible pre-sliced .3mf or .gcode files. If you have geometry but no slice, start with our STL-to-print-ready guide, then slice and export the approved plate. An unsliced .3mf may have an opt-in auto-slice option, subject to availability. For a set spread across plates, see the multi-plate order guide.
Use a design you own or have permission to reproduce; our downloaded-model guide covers that preparation step. CAD creation, sample approval and finishing are not included in the printing route. Once the file is ready, upload it, review the parsed print details, select compatible stocked filament and review the current CAD quote. Free scheduled Toronto pickup and Canada Post shipping are available through the ordering options.
If the stand type is still open, start with the small retail-display comparison to decide whether a pocket, angle or ordinary stock riser solves the merchandising job.
For competing pocket or lip revisions, adapt the test-print comparison worksheet so the same product and counter remain the reference.
Questions before you order the set
Can an empty dummy product be enough?
For a defined outline or spacing question, yes. Record that it was a dummy and what it omitted. Before approving how the loaded stand behaves or how merchandise is removed, use a representative packaged item. A successful spacing check leaves those other questions open.
Does the first sample need the final colour and finish?
Only if appearance is part of that approval. You can separate a geometry review from a later appearance review, but identify both samples. If the finished set will be painted by your team, an unpainted sample leaves the final surface—and fit after finishing—unresolved.
How do we decide whether the stand is stable enough?
Check the intended light-product arrangements and gentle normal handling on the fully supporting counter. Any unexplained rocking, sliding or tipping is a reason to stop and revise. This review gives no rated load or structural certification; unresolved behaviour calls for a suitable manufactured alternative or a different design process.
Can we send the same file for several counters?
Yes, if the file is compatible, but compare the locations before approving the set. A different footprint allowance, counter surface, viewing direction or lighting can change the review. Keep the accepted arrangement and sample revision linked to the locations where you checked them.
Sources checked
Frank Mayer, Why retail display prototypes are an important stage in the manufacturing process. Manufacturer guidance on full-scale sample review; verified: 2026-10-05.
Return to text: 1
Frank Mayer, Our process. Model-shop use of foam-core designs and dimension visualization; verified: 2026-10-05.
Return to text: 1
Samtop, Custom retail display prototyping and sample development. Product/dummy inputs and the approved sample as a repeat-production reference; verified: 2026-10-05.
Displays2Go, Acrylic countertop sign holder. Product-specific graphic-channel and media specifications; verified: 2026-10-05.
Return to text: 1
Scott Buchanan, Wire to Wire Manufacturing, Designing a point of purchase display that works for you. Undated manufacturer planning guide; footprint, location and signage questions used here, not its financial examples; verified: 2026-10-05.
Return to text: 1
Prusa Research, Prusa Academy postprocessing course overview. Public overview of filling, sanding and painting; verified: 2026-10-05.
Return to text: 1
Prusa Knowledge Base, PLA. Manufacturer material guidance, not a finished-display rating; verified: 2026-10-05.
Return to text: 1
Prusa Polymers Team, Chemical resistance of 3D printing materials. Exposure variables and specimen testing; verified: 2026-10-05.
Return to text: 1
Have a sliced file ready?
Upload it for an instant quote in CAD.