Already have the model? Printing a replacement part in Toronto
Updated · 9 min read
Before ordering a replacement knob, bracket, clip, or cover, check the model, fit, material, load, and slice that determine whether it works.
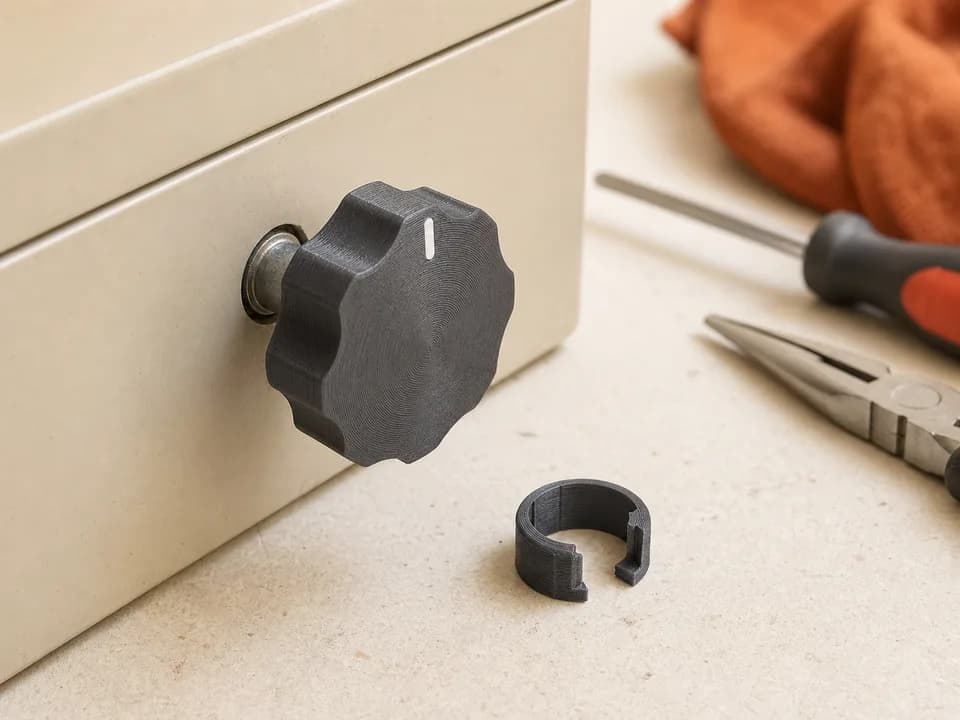
If you already have a legitimate 3D model for a broken knob, clip, cap, spacer, cover or other low-consequence plastic part, local 3D printing can be a practical way to make a replacement. The model is the starting point: fit, material and slicing still decide whether the physical part is useful.
We print customer-supplied models. We do not scan the original part, design a new replacement, repair a broken model, or certify the finished print.
Start with the right kind of replacement
A sensible first candidate has an available model, a clear job and a low cost of failure. Think of a missing dial, cable guide, storage bin clip, furniture foot or decorative cover. You should be able to inspect and test it without putting a person, vehicle, building or expensive machine at risk.
We do not print parts that must be relied on for safety-critical, load-bearing, medical, food-contact or other certified uses. Printed parts are not tested or certified replacements. The complete restrictions are in our terms of service. If failure could cause an injury, fire, leak, electrical hazard or major property damage, use an original manufacturer part or a properly engineered and qualified alternative.
This caution is not just a printing preference. Health Canada's guidance says the definition of a consumer product can include its components, parts and accessories, and suppliers remain responsible for applicable safety requirements. A downloaded shape is not proof of fitness for a regulated or hazardous use.
Confirm that the model belongs to your exact item
Product families often reuse a name while changing dimensions, fasteners or internal geometry. Before slicing, compare the digital model with the original part and the thing it mates with.
- Check the manufacturer, product revision and model number, not only the product name.
- Measure the overall length, width and height, plus hole spacing, shaft diameter, thread location and clip thickness where relevant.
- Confirm the model's units. A file interpreted in the wrong unit system can look valid while being wildly out of scale.
- Look for wear on the broken original. Copying a stretched hole or bent tab may reproduce the failure instead of the intended fit.
- Make sure you own the design or have permission to reproduce it. Our guide to printing a downloaded model explains what to check before using a public file.
A photo is useful for your own comparison, but it is not a printable model and we cannot derive accurate geometry from it as part of the order. If no suitable file exists, a CAD designer or repair specialist is the right first stop.
Check fit before ordering a full batch
Mating features deserve more attention than cosmetic surfaces. Inspect holes, pins, snap tabs, slots, contact faces and the space around moving parts. A model can look perfect on screen and still bind, wobble or miss a fastener after printing.
Do not apply a universal clearance value from a forum and assume it fits every design. Printer process, material, part orientation and the original product's tolerances all matter. For an uncertain fit, order one inexpensive test piece or a small fit coupon before a larger batch. Change the source model when dimensions are wrong, then reslice it; scaling the entire object can also change features that were already correct.
Choose material for the environment, not just the colour
Write down what the replacement will actually encounter: indoor or outdoor use, sun, heat, moisture, cleaners, repeated flexing, friction and impact. Then choose from the materials currently shown in the quote flow. A colour match does not make two plastics interchangeable, and a model's suggested material is not a certification.
If you cannot identify the loads or environment, that uncertainty is a reason to stay with an original replacement. Material extrusion builds a part layer by layer, as the NIST overview of material extrusion explains. Published testing guidance also treats material, orientation, processing and environment as variables that affect measured properties. A printed material name alone cannot tell you how the finished part will behave.
Orient and slice the part deliberately
Orientation changes the layers, support contact, visible surface and print time. Put the part on the plate in a way that gives important mating surfaces a sensible finish and avoids unnecessary supports. Then inspect the sliced preview for missing thin walls, unsupported starts and details that disappear at the chosen settings.
An STL contains geometry, not print instructions. Follow the STL-to-print-ready guide to select the machine and material profile, slice the plate and export a .gcode.3mf. When appearance permits, you can also use the slicer preview and our quote-reduction checklist to remove avoidable supports or machine time without blindly making the part thinner.
Replacement-part upload checklist
- Confirm the application is low-consequence and allowed under our terms.
- Verify the model revision, measurements, units and reproduction rights.
- Select a material based on the real environment and intended use.
- Choose the orientation and settings, then inspect every layer in preview.
- Export the plate sliced file, not only the model or saved project.
- Upload the sliced file, review the parsed time and material, select a stocked filament, and approve the CAD quote only if the details match your slice.
- Test the received part in a controlled way before normal use, and stop using it if it cracks, deforms or does not fit correctly.
What a print does—and does not—solve
We reproduce the submitted toolpath with reasonable care; we do not validate the engineering of the model or its suitability for your product. A clean print can still be the wrong revision, material, tolerance or orientation. That division of responsibility is why a careful model check and a small test order often save more time than rushing straight to the final quantity.
Sources checked
- Health Canada's Consumer Product Safety Act FAQ — treatment of consumer products, components, parts and accessories.
- NIST material-extrusion overview — the layer-by-layer manufacturing process.
- ASTM F3489 material-extrusion guide — variables relevant to evaluating mechanical properties.
- Official Bambu Studio product page — project preparation and slicing workflow.
Sources verified: 2026-07-21.
Have a sliced file ready?
Upload it for an instant quote in CAD.