Demonstration models for trade shows and client presentations
Updated · 9 min read
Start with the visitor's question, then choose a scale model, cutaway or enlarged detail. A practical brief for preparing a small nonfunctional presentation model.
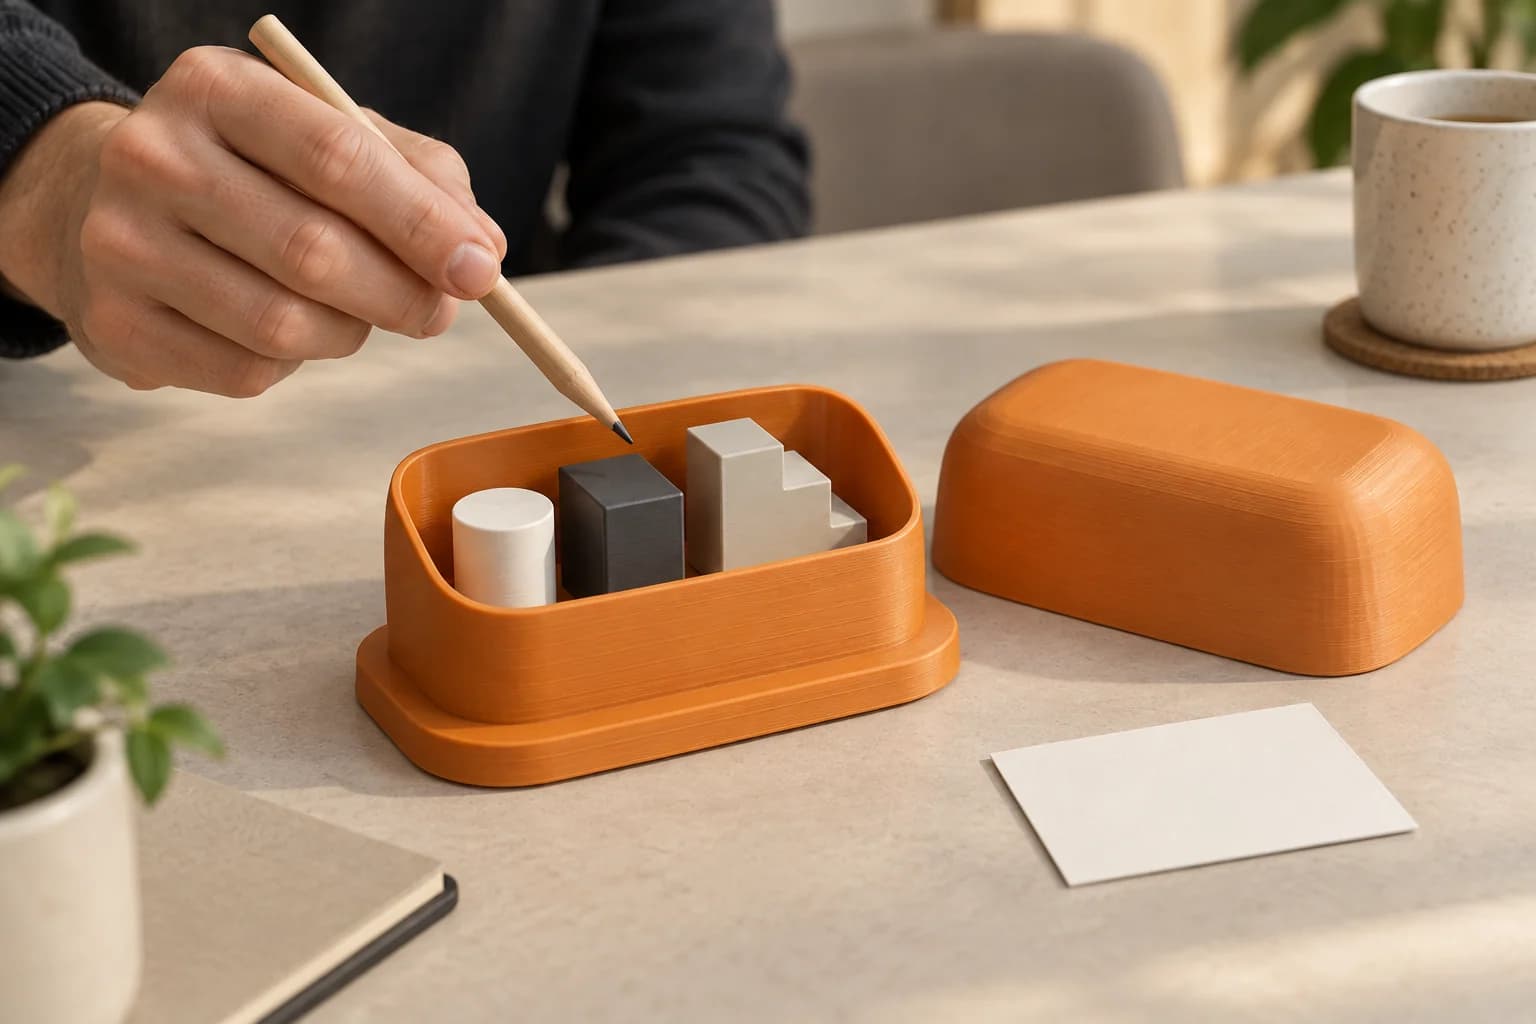
A small 3D printed demonstration model is useful when it gives your presenter something specific to explain: how three modules fit together, what sits behind a cover, or which detail makes a concept different. Choose that explanation before choosing the scale. Then prepare a nonfunctional model with readable geometry, manageable pieces and a packing plan.
For Toronto exhibit producers and technical sales teams, this is a tabletop visual aid. We print authorized, compatible customer files at 3dPrintsToronto. Preparing the presentation design, assembling it and arranging any specialist finish are separate work for your team.
Start with the question your visitor will ask
Write one sentence: “After this conversation, the visitor should understand _ because we can point to _.”
“Understand our product” is too broad. “See that the three modules occupy separate spaces inside one shell” gives the designer a clear task. A client meeting might need a seated viewer to inspect an opening. A trade-show counter might need the same opening visible while the presenter keeps hold of the cover. Those are different briefs.
Decide who handles the model, how much table space it gets and where the removed pieces will rest. If a diagram explains the relationship more clearly, use a diagram. If the discussion depends on motion, a short animation or an appropriate demonstration of the real product may be the better choice. The printed model represents an idea; it does not establish the product's operation or performance.
Choose the view that explains the idea
Use this comparison as a planning aid, rather than a list of features to include in every model.
| Representation | What it helps you discuss | What the designer must resolve |
|---|---|---|
| Reduced whole model | Overall arrangement and recognizable exterior | Which small details can be omitted or simplified at the selected scale |
| Fixed cutaway | A hidden relationship that should always remain visible | Where to open the shell without obscuring the parts you want to explain |
| Lift-off cover | Exterior first, then an interior reveal | Grip, seating, alignment and a safe resting place for the cover |
| Enlarged detail | A feature too small to point to on the whole model | Its separate reference scale and how the presenter connects it to the whole |
| Separate static modules | Layout or a sequence described by the presenter | Identification, arrangement and the number of loose pieces |
Named exhibition projects show why these choices matter. In 3D Systems' historical On Site Gas Systems case, five equipment models were prepared at 1:14 scale for Gastech 2015. The supplier modified the reduced geometry, used selective laser sintering and hand-painted the models.1 LGM's FAA educational display combined overall aircraft representations with cutaway section views and reported different scales for them.2
These are specialist industrial fabrication examples. They illustrate ways to select a view; their processes, finishes and reported outcomes do not describe our desktop filament-printing service. Our scope here is a small static model, without working electrical, pressure or medical components, booth structures or suspended displays.
Keep the reference scale honest
Uniform scaling changes every dimension. In a hypothetical example, a 1,200 mm product shell becomes 120 mm long at 1:10. Its walls, ribs and joints shrink too. That calculation does not show whether the important features remain printable or readable.
Ask the authorized designer to make a display version of the geometry. Keep the features needed for the conversation. Remove irrelevant fasteners and hidden details; exclude confidential internals that should not appear in the presentation. Identify anything deliberately thickened, enlarged or represented by a simplified block. The presentation card should distinguish the reference scale from those exceptions.
An enlarged detail can sit beside a reduced whole model, provided its different scale is clear. Avoid describing altered geometry as an exact replica.
Inspect the sliced paths at the final size. Prusa's documentation explains that thin walls may still be omitted and that wall recommendations depend on slicing variables.3 Check the specific opening, rib or edge your presenter intends to point to. A feature visible in the model preview is not enough if it disappears from the print instructions.
Give the designer a model brief they can act on
The following hypothetical brief describes a generic modular product shell. It is an example to adapt, not an available in-house design or a tested project.
| Brief field | Example decision |
|---|---|
| Audience question | How do the three modules fit inside the shell? |
| Presentation sequence | Show the exterior, lift off the cover, point to each module, replace the cover |
| Representation | Reduced shell with three simplified static internal blocks |
| Accuracy note | Record the reference scale; disclose thickened walls and abstracted internals |
| Part count | Five printed pieces: shell/base, three blocks and cover |
| Handling | Presenter removes the cover; internal blocks remain fixed after assembly |
| Identification | Distinct shapes and positions, with colour as an additional cue |
| Sample to approve | Cover seating and one representative visible detail |
| Finish responsibility | Producer approves print texture or commissions a separate finish |
| Transport responsibility | Producer provides protected spaces for the assembled body and cover |
Add the source revision and a named person who approves the result. This makes it easier to resolve a late request: does the change help answer the audience question, or merely add detail?
Test the removable section before the complete set
A fixed cutaway avoids a removal step. A cover that lifts off gives the presenter an exterior-to-interior sequence, but adds mating surfaces and a loose piece. Choose it because that sequence helps the explanation.
Sectioning also affects printing. Prusa's cut-tool documentation describes splitting models to fit a build area, change orientation or reduce support, with several connector options.4 Those tools help prepare geometry; a generated connector does not prove that a particular cover will fit or survive repeated handling.
Have the designer prepare a representative joint or cover-edge sample. Assess it using the intended material and orientation before committing to the complete model. There is no universal clearance to apply to every removable part. If finishing is planned, recheck the fit after that finish.
Rehearse with a colleague unfamiliar with the concept. Can they identify the relevant parts from their side of the table? Can the presenter lift and replace the cover without forcing it? Does the explanation still work when the model faces the visitor? If not, change the view or presentation sequence before adding more detail.
Plan the visible finish and the journey
Approve the appearance you actually need. Plan for visible print texture and decide where seams or support contact would interfere with the explanation. Choose from currently stocked materials and colours; use shape, position or an accompanying legend as well as colour to distinguish the modules.
Painted exhibition-model photographs can hide substantial additional work. Agile Manufacturing's Olympus separator model used SLA components, colour-matched paint, contrasting accents, decals and a foam-lined custom case.5 That account shows finishing and packaging as part of a specialist project. Painting, smoothing, decals, assembly and custom cases are not included in our print order.
Include transport and storage in the material discussion. Prusa lists concept models among PLA's uses, while noting heat, UV and impact limitations.6 A material name alone is not evidence that the finished model can tolerate a hot vehicle, rough handling or a season of shows.
For your event case, give the cover and delicate details protected spaces. Support the model at broad, robust areas rather than pressing packing material against protrusions. Photograph the packed arrangement and keep a piece count. Canada Post's parcel guidance recommends cushioning fragile contents on all sides, wrapping individual contents and using void fill to stabilize them.7 That guidance is useful for separation and protection; it does not qualify a reusable exhibition case.
Inspect the model after each journey. Where a small piece is essential to the explanation, consider an approved spare and keep its file revision with the set. Leave time before the event for inspection, assembly, any finishing and a rehearsal.
Prepare authorized files before ordering
Confirm that your team may reproduce the design, make the intended simplifications and disclose the file to a print service. CIPO explains reproduction rights and the role of written licensing agreements.8 For downloaded submodels, check the actual licence: Creative Commons terms can involve attribution, commercial-use restrictions and conditions on adaptations.9 Keep the relevant permission with the project record. Check confidentiality separately, especially before sharing internal product geometry.
Freeze the approved revision, reference scale, exceptions, part count and sample decision. Our STL-to-print-ready guide explains the difference between model geometry and printer instructions. Follow the plate slicing and export guide to prepare a compatible sliced .3mf or .gcode. For sections spread across plates, the multi-plate order guide explains how to keep the set together.
An unsliced .3mf has an opt-in auto-slice path, subject to availability. It still needs prepared printable geometry; it does not convert a drawing or photograph into a demonstration design.
When ready, upload the compatible file, check the parsed material and time, select compatible stocked filament and review the quote in CAD. Free scheduled Toronto pickup is our default; Canada Post shipping can be selected when offered in the ordering options. Your onward event transport, case and presentation preparation remain your team's responsibility. Use the turnaround guide when planning the deadline.
Use the event-prop teardown and packing record to make the removable cover and every demonstration piece identifiable to the next presenter.
For a model tied to real-world dimensions, the architectural scale-planning checks show how to compare overall footprint with the smallest feature that must remain readable.
Frequently asked questions
Can we order a model from a product photograph or CAD drawing?
Have a designer prepare the printable presentation geometry first. We do not provide scanning, reverse engineering or CAD/BIM conversion as part of an order. Our upload flow needs compatible prepared files.
Should we use an exact scale replica or a simplified cutaway?
Choose according to the audience question. A whole model supports discussion of overall arrangement; a cutaway exposes a hidden relationship. Record the reference scale and disclose deliberate changes so the presenter can explain what the model represents.
Can a cover come off during the presentation?
Yes, as a design choice for a nonfunctional model. Give it an accessible grip and a place to rest. Approve a fit sample, check it after any intended finish and rehearse removal and replacement. That process does not establish a guaranteed handling lifespan.
Can we ship the model and reuse it at several shows?
Plan protection for each piece, document how it packs and inspect it after transport. A model that works at one meeting still needs assessment for repeated travel. We do not guarantee touring durability or event arrival dates; allow time for your own acceptance and preparation.
Sources checked
3D Systems: On Site Gas Systems case study. Historical supplier report; verified: 2026-10-05.
Return to text: 1
LGM: Educational aviation model display. Specialist project account; verified: 2026-10-05.
Return to text: 1
Prusa Research: Layers and perimeters. Software documentation; verified: 2026-10-05.
Return to text: 1
Prusa Research: Cut tool. Software documentation; verified: 2026-10-05.
Return to text: 1
Agile Manufacturing: 3D printed trade-show models. Supplier's Olympus project account; verified: 2026-10-05.
Return to text: 1
Prusa Research: PLA. General material guidance, not finished-model testing; verified: 2026-10-05.
Return to text: 1
Canada Post: Packaging and wrapping overview. General parcel guidance; verified: 2026-10-05.
Return to text: 1
Canadian Intellectual Property Office: Learn copyright. General rights guidance; verified: 2026-10-05.
Return to text: 1
Creative Commons: Frequently asked questions. General licence guidance; verified: 2026-10-05.
Return to text: 1
Have a sliced file ready?
Upload it for an instant quote in CAD.