3D printed photo props: shapes, texture and window-light patterns
Updated · 9 min read
Choose decorative tabletop shapes for the final frame, compare existing props and compatible light modifiers, and use a proof-of-shot worksheet before ordering a set.
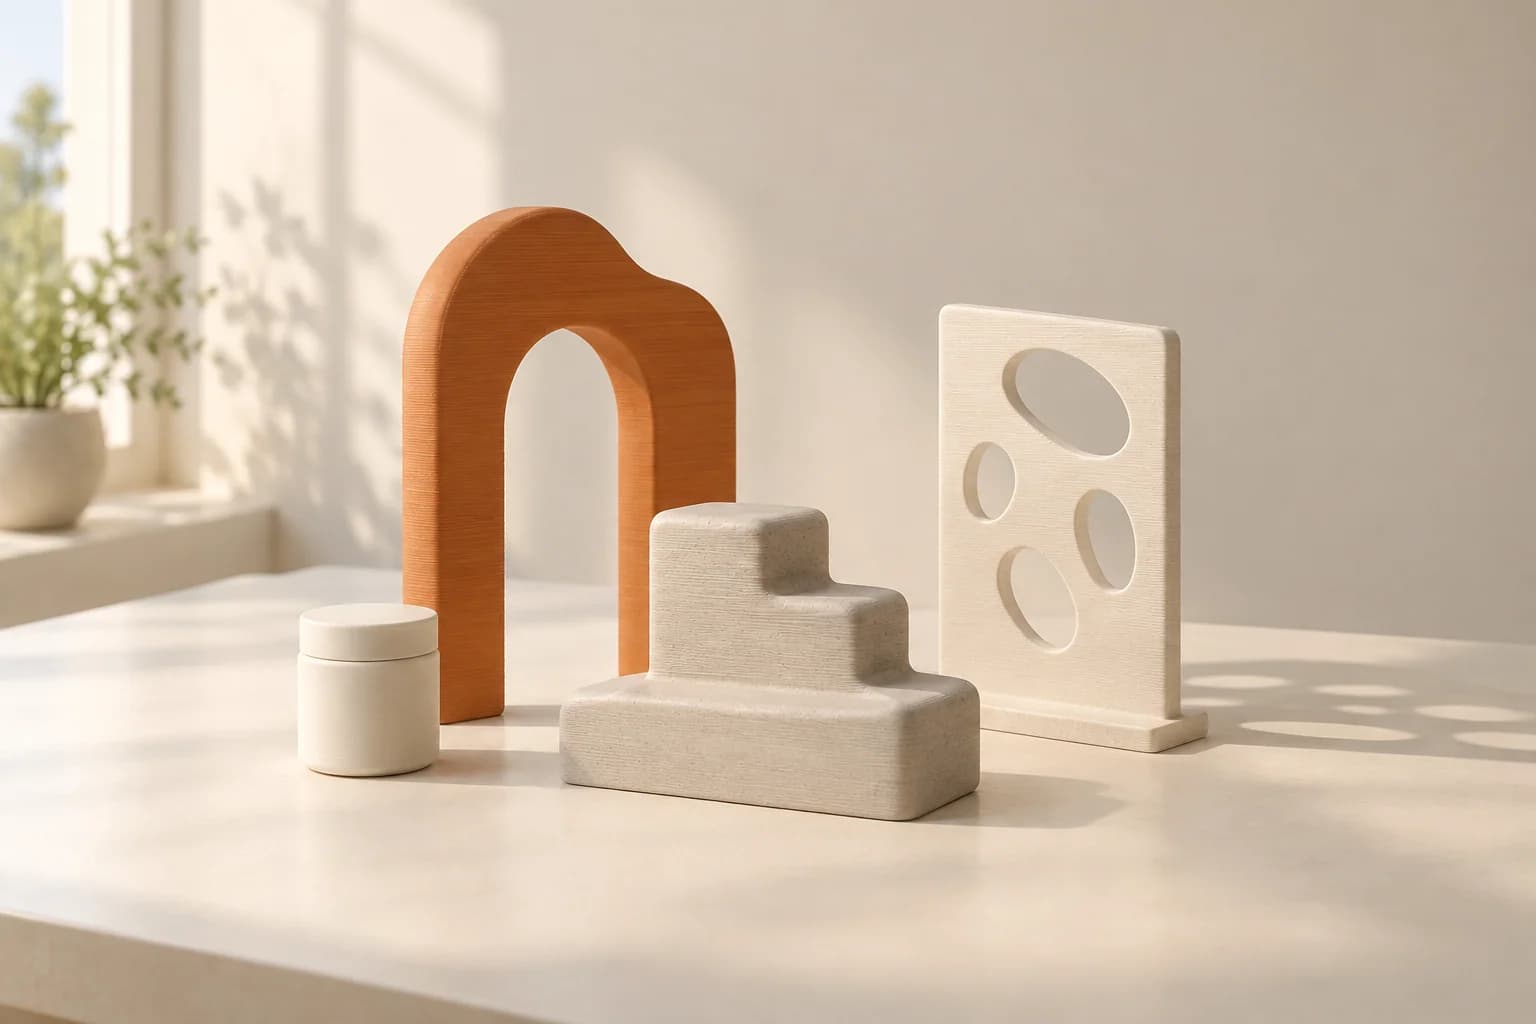
3D printed photo props make sense when a small tabletop set needs a particular shape: a decorative arch beside a product, a stepped form in the background or a panel that repeats across several shots. Start with one authorised model and approve a physical sample through the camera. For controlled lighting effects, choose the light manufacturer's compatible modifier.
The useful question is what the shape contributes to the final frame. For a Toronto product photographer, a successful print might be a quiet background detail rather than the centrepiece. Its scale, visible texture and shadow need to suit the shot before you order a complete set.
Give each shape a job in the frame
Write the image brief before choosing the model. Which edge should lead towards the product? Which part of the background needs interest? How much of the prop will survive the final crop?
For a first print, we suggest a small decorative form that stands beside the subject. Keep the product on the tabletop. That lets you evaluate the visual idea without relying on a printed piece to hold valuable gear or an unstable object.
Two supplier examples show different uses. It's Me Lisa G sells a printed small-product backdrop panel and deliberately keeps its lower area plain so the product remains the focus. Backdrops NZ lists a printed stacked-cube photography prop. These are examples of set elements already offered by other makers; their listings do not provide permission to reproduce the designs. (Backdrop panel, stacked-cube prop; verified: 2026-10-05.)
Our proposed selection questions are:
- Silhouette: does the curve, step or opening help the composition?
- Scale: does it leave the subject room, including space for any eventual crop or copy?
- Visible faces: which surfaces will the camera actually see?
- Placement: can the form sit independently on a clear, level tabletop?
- Reuse: does the same shape work for the next planned shot, or only this angle?
Avoid choosing a complicated object simply because it looks impressive in a render. A small change to the outline may matter more to the photograph than detail hidden behind the product.
Compare printing with props you already own
A purchased prop, background sheet or ordinary studio-owned object deserves a quick camera trial. In Profoto's beauty-product styling tutorial, Annabelle Plueckthun and Humphrey Khouw create two sets using retail objects from IKEA. Their example is a useful reminder to look at the existing prop cupboard before commissioning another shape. (Profoto styling tutorial; verified: 2026-10-05.)
Use this planning comparison to choose a route:
| Route | Visual job | Decision to make before spending |
|---|---|---|
| Studio-owned or purchased prop | A familiar shape or background already suits the frame | Can you obtain the right appearance without another print? |
| Decorative printed form | A specific small outline, scale or repeated shape | Do you have a cleared model, and is its printed surface acceptable in the shot? |
| Freestanding ambient-light panel | A room-temperature tabletop pattern experiment | Is the appearance useful in the actual window light, even if the shadow is soft or indistinct? |
| Compatible manufacturer modifier | Controlled projection, spill control or colour treatment | Does the exact modifier support your light under its current instructions? |
Printing is a sensible candidate when the shape itself matters and an authorised file exists. We cannot establish that it will be cheaper, faster or visually better than an available prop without comparing the actual options.
Review texture at the delivery size
The backdrop-panel maker explicitly acknowledges layer lines and slight surface variation. Backdrops NZ describes its own prop as matte; that description applies to its product, not every printed filament or surface. (Panel finish notes, supplier's finish description; verified: 2026-10-05.)
Before ordering, inspect the slice for cut-outs that disappear, seams on visible faces and surfaces that touch supports. Use our plate-slicing guide for the preparation steps. There is no single setting that establishes the right appearance for every studio brief.
With the received sample, take the intended shot and review it at the planned output size. Then inspect a closer crop to identify what you are accepting. Ask whether layer texture adds interest, whether a seam looks accidental and whether unwanted highlights draw attention away from the subject. Record those decisions instead of approving the prop only by eye on the desk.
Treat translucent material as another visual sample. Prusa's transparent-object experiments explain that gaps around extruded filament can disperse light, producing translucency rather than transparency under generic settings. A clear-filament name therefore gives us no basis to promise a clear optical surface or neutral diffusion. (Prusa transparency experiments; verified: 2026-10-05.)
Explore window-light patterns on the tabletop
One proposed experiment is a small perforated panel with a broad base, standing independently beside an empty part of the set. In room-temperature ambient window light, photograph the panel and whatever shadow it actually produces. Try ordinary changes in tabletop position and composition. Judge the result without assuming it will produce a sharp projected pattern.
This is a decorative set experiment. We exclude printed lamp attachments, covers, projector internals and equipment-support parts from this article's ordering scope. Keep the panel away from hot fixtures and intense sources; do not convert it into a fixture-installed gobo.
Historical maker projects can be useful creative context. Prusa's 2020 photography-gadget article includes decorative props alongside lighting gadgets. Photographer Petri Damstén also documented a DIY gobo system and a home-studio shoot in 2020. Those accounts describe particular projects; we are not offering their builds or treating them as approval for another light. (Prusa photo gadgets, Damstén's project account; verified: 2026-10-05.)
For powered-light work, follow the exact manufacturer's system. Profoto's OCF II Grid & Gel Kit directions restrict it to specified flat-front lights with LED modelling lights and exclude halogen modelling lights. Aputure's Spotlight Mini manual specifies M-size metal or glass gobos within that system. These instructions govern the manufacturer's products; they do not permit printed plastic substitutes or establish compatibility with a different fixture. (Profoto kit, Aputure manual, gobo section; verified: 2026-10-05.)
Keep a proof-of-shot worksheet
We propose the following record for approving one sample. It is a visual review worksheet, not a load test, optical test or equipment qualification.
| Record | What to save or answer |
|---|---|
| Model and permission | Author, source URL, model revision and exact permission for the intended reproduction/use |
| Printed version | File name, selected material and colour, scale and slice orientation |
| Shot reference | Camera viewpoint, final crop, background and reference image |
| Proportions | Does the prop leave enough space around the subject and remain useful in every required crop? |
| Surface | Which layer lines, seams, support marks or other variations are visible at delivery size? |
| Light and shadow | Are highlights, colour influence and shadow shapes acceptable in the intended set? |
| Ordinary placement | Does the unloaded decorative prop remain upright without balancing or improvising support? |
| Decision | Accept, revise or reject; identify the exact change before ordering again |
For a hypothetical small-brand shoot, put an empty substitute container beside one decorative arch. Capture the intended wide frame and close crop. If the arch overwhelms the container, revise the model's proportions before reslicing. If texture is distracting, compare another ready-made prop. You have a concrete decision to make before multiplying the pieces.
Save the approved file with the reference image. When scale, material, colour or orientation changes, review the changed sample. A reference shot helps communicate an accepted appearance; it is not a guarantee that every later piece or lighting setup will be identical.
Prepare the authorised file for a Toronto order
Keep the model's licence or written permission with the shoot notes. Creative Commons licences differ: attribution is a condition of CC BY, while NC licences restrict use to noncommercial purposes. Check the exact licence and obtain permission if paid reproduction or your intended commercial use is unclear. Clear supplied artwork separately. (Creative Commons licence conditions; verified: 2026-10-05.)
Our downloaded-model guide covers that first check. A photograph or a seller's product listing does not supply an authorised printable model.
At 3dPrintsToronto, we print authorised customer models supplied as compatible pre-sliced .3mf or .gcode files. If you have an STL, follow the STL-to-print-ready guide. An unsliced .3mf has an opt-in auto-slice path, subject to availability. We do not provide CAD or finishing as part of a print order.
Choose from currently stocked materials, upload the prepared file and review the CAD quote before paying. Order one sample under the normal ordering terms when its appearance is uncertain. Fulfilment options are free scheduled Toronto pickup or Canada Post shipping through the options available to the order. Leave time for your own camera review before committing the prop to a shoot.
If the shapes will travel between shoots, adapt the event-prop packing and reuse record to keep each decorative piece and its accepted arrangement identifiable.
For the cards, filters and detached caps around the set, the photography organizer guide addresses kit fit and retrieval as a separate studio task.
Questions from the studio bench
Will layer lines show in close-up product photographs?
Treat their visibility as something to check in the actual shot. The panel supplier acknowledges visible print variation; our recommendation is to approve the sample at the delivery size and review a closer crop before ordering a set. (Panel finish notes; verified: 2026-10-05.)
Can I order a printed diffuser, gobo holder or cover for my light?
Those fixture accessories are outside this scope. Use the exact light manufacturer's compatible modifier and current instructions. An LED label alone does not approve a printed attachment.
Can transparent filament replace a professional diffuser?
We have no optical-neutrality or repeatability evidence for that use. Keep a translucent print a decorative ambient-light sample, and use a supported modifier when the shoot requires controlled diffusion.
Can you make a prop from a picture I found online?
An order needs an authorised printable model and compatible file preparation. A picture can guide your own brief, but it does not establish geometry or reproduction rights. If no cleared model exists, arrange design work separately before preparing the print file.
Should I order all the props for a campaign at once?
We suggest approving one representative sample first when scale or finish is uncertain. Record the exact accepted version and reference shot, then prepare the required quantity. This is a normal paid order, not a free-sample offer.
Have a sliced file ready?
Upload it for an instant quote in CAD.