How to measure a drawer for Gridfinity bins and baseplates
Updated · 6 min read
Measure the usable inside space, calculate the whole grid cells and check the height separately. Our worked examples explain exactly what the calculator does with the remaining drawer space.
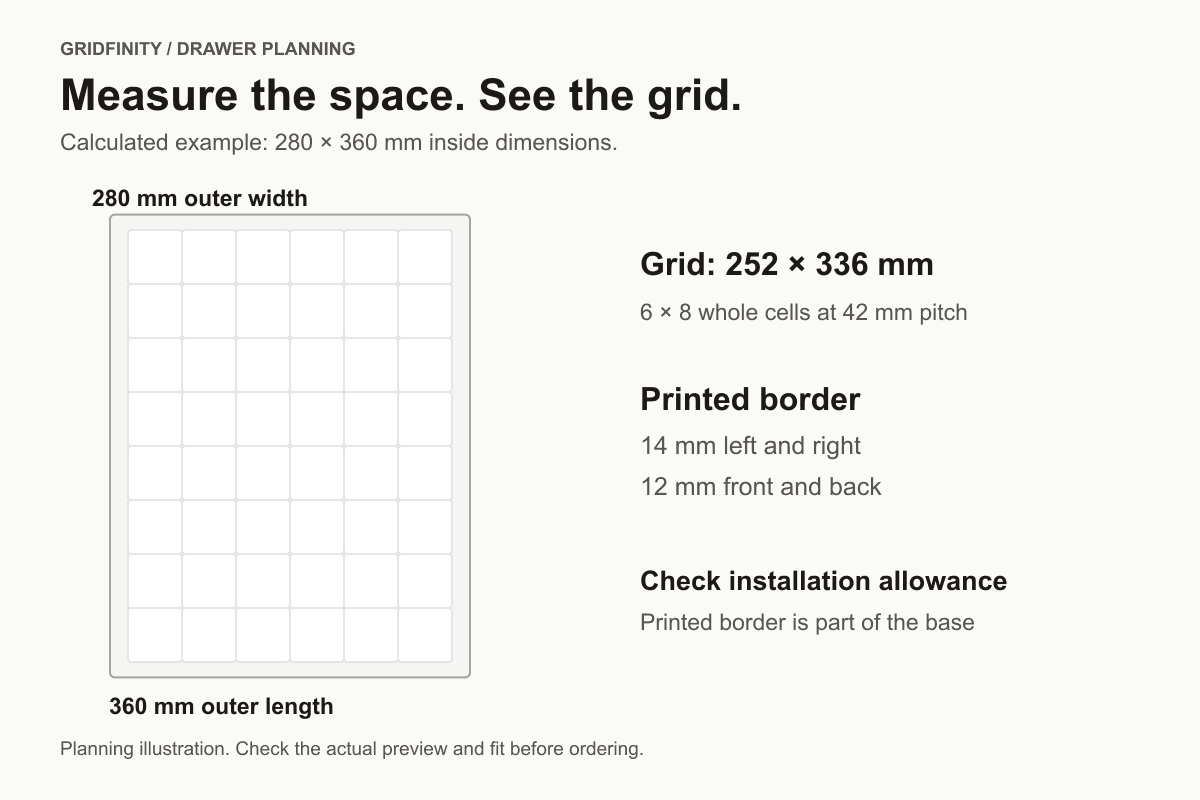
Measure the usable inside width and length of your drawer before choosing Gridfinity bins. Then check the height available with the drawer closed. Our Gridfinity calculator turns the entered footprint into a whole-cell grid and lets you arrange rectangular boxes before requesting prints in Toronto.
The detail to settle first is the printed base's outer size. In our calculator, the space around the whole-cell grid becomes a printed perimeter. That perimeter fills the dimensions you enter, so installation clearance needs a separate allowance.
Measure the narrowest usable inside footprint
Empty the drawer and measure inside, between the surfaces that will surround the base. Check width at the front, middle and back. Check length on both sides and through the centre. Record the smallest usable measurements, including any obstruction that occupies the planned footprint.
Look at corner curves, screw heads and any inward slope near the floor. A ruler held above the bottom can miss an obstruction where the base will sit. Draw the usable rectangle on paper if an irregular corner makes the measurement unclear.
- 1Inside width. Measure from the left wall to the right wall at the front, middle and back. Record the smallest reading.
- 2Inside length. Measure from the front wall to the back wall on the left, through the centre and on the right. Record the smallest reading.
- 3Obstructions. Corner curves, screw heads and inward slopes take space where the base sits. Measure at floor level; a ruler held higher can miss them.
- 4Usable rectangle. The narrowest clear rectangle at floor level is your raw usable footprint. Subtract your own installation allowance before entering the finished base size.
Decide how much room you need to insert and remove the base. Enter the intended finished outer footprint after that allowance. We do not prescribe one clearance for every drawer, model and material. Keep the raw inside measurements and your chosen allowance in your own record. Send that record through Contact if you need to discuss the intended fit.
Work out the grid and the printed perimeter
Our calculator uses a 42 mm grid pitch and rounds down to whole cells on each axis. For a hypothetical entered footprint of 280 by 360 mm, the calculation is:
- Width: 280 ÷ 42 gives 6 whole columns, occupying 252 mm.
- Length: 360 ÷ 42 gives 8 whole rows, occupying 336 mm.
- The remaining 28 mm of width becomes 14 mm of printed border on each side.
- The remaining 24 mm of length becomes 12 mm at the front and back.
That produces a 6 by 8 grid inside a 280 by 360 mm printed base. Entering an exactly 280 by 360 mm drawer opening would leave no planned installation clearance in this example. Review the intended outer footprint before moving forward.
Check your drawer measurements in the calculator
Enter your inside drawer measurements and arrange your boxes in the browser. Use Generate preview when offered, then choose an available material and review the full quote before paying.
Open the Gridfinity calculatorThe calculator shows current preview and ordering availability. For an existing model or a layout the tool cannot prepare, ask us about your print.
A 300 by 300 mm entered footprint gives a 7 by 7 grid. Its cells occupy 294 by 294 mm, with a 3 mm printed border on every side. The number of whole cells changes at each 42 mm boundary; small changes near a boundary deserve another look.
Check closing height with the intended contents
Measure from the support surface to the lowest obstruction above the contents as the drawer closes. Include anything projecting down into that path. Keep space for the objects you plan to store and the way you lift them out.
The calculator applies one common box height to the layout. It accepts whole-millimetre values from 11 to 240 mm. Choose a height that suits this drawer and inspect the generated model when generation is offered. An accepted height value does not establish usable internal depth or confirm that the contents will clear the drawer above.
Check the cavity before assigning a bin size
A box selected across 2 by 3 cells occupies a grid allocation of 84 by 126 mm. Those dimensions describe its position on the grid. Check the actual model's internal cavity before assuming an object of that size will fit, and allow room to grasp it.
Our planner caps an individual box at 5 by 5 cells. That is a layout limit; production also depends on the selected model and available print area. A valid rectangle on screen can still require a smaller box choice during manufacturing review. The tool-drawer planning guide shows how to turn measured contents into a bin schedule.
Keep a short measurement record with the request
Before ordering, record the smallest inside width and length, the intended printed footprint, your installation allowance, closing height and chosen common box height. Include a photo or sketch of obstructions and identify which edge is the front.
Use our baseplate-or-bins guide if you already own part of the system. Check compatibility against those actual parts. For a new order, the Toronto Gridfinity cost guide explains what to include in a comparable quote request.
Review your dimensions in the calculator. When Generate preview is offered, follow the available model review and quote steps. Otherwise, send us your measurements or upload a compatible file you have permission to reproduce. Our Toronto Gridfinity printing guide covers that route and scheduled pickup.
Start with your drawer measurements
Arrange your boxes in the calculator, then follow the available preview and ordering options. Review the full quote before paying.